AWS (Amazon Web Services) is a cloud-based system for building and deploying software. It has over 200 products for a wide range of technologies. One of which includes Amazon Elastic Kubernetes Service (EKS), a container orchestration tool.
Kubernetes is used to maintain and deploy a group of containers at runtime. It’s mostly used alongside several container-based engines, such as Docker, CRI-O, Containerd, etc., for better control and implementation of containerized applications.
This article will teach you about the Amazon EKS architecture and the two methods of deploying a Kubernetes cluster on AWS — using the AWS console or your local machine.
Prerequisites
This article assumes the reader has the following:
- An Amazon web services account
- AWS command-line interface (CLI)
- eksctl & kubectl
- VS Code and the Kubernetes VS Code extension
What is a Kubernetes cluster?
A Kubernetes cluster consists of nodes that run containerized applications. Of these nodes are the master nodes, also collectively known as the control plane responsible for managing the cluster, and the worker nodes, collectively known as the data plane, which runs the cluster’s workload (containerized applications).
What is Amazon EKS?
Amazon Elastic Kubernetes Service (EKS) is used to start, run and scale Kubernetes on cloud or on-premise without operating or maintaining your own Kubernetes control plane or node.
It manages your master nodes, pre-installs the necessary apps (container runtime & master processes), and also helps in scaling and backing up your applications, thereby allowing you and your team to focus on deploying your applications.
Understanding the Amazon EKS architecture
I added this section because I believe understanding the architectural components of Amazon EKS will give you a better understanding of how deploying a Kubernetes cluster to AWS works.
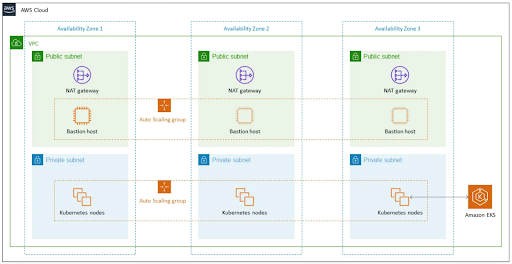
Image credit: Amazon
Looking at the Amazon EKS architectural diagram above, you’d see it comprises different components. Here’s a brief explanation of each of them;
- Availability zone: These are locations where the servers are located. A highly available AWS EKS architecture should span across 3 availability zones to maintain a high availability and eliminate failure within one zone.
- Virtual Private Cloud: This is a virtual network on AWS that enables you to launch AWS resources in a virtual network using the scalable infrastructure of AWS.
- Public subnet: These are a range of IP addresses the public can access.
- Private subnet: These are a range of private IP addresses.
- Network Address Translation (NAT): These gateways are managed in the public subnets to enable access to resources in the private subnet from an outbound internet network.
- Bastion host: A Linux bastion host is configured to a public subnet in an auto-scaling group to enable inbound secure shell access to Amazon Elastic Compute Cloud (EC2) in private subnets.
- Amazon EKS cluster: The Amazon EKS cluster provides the Kubernetes control plane, which controls the Kubernetes’ nodes in the private subnets.
Looking at the architectural diagram above, you’d see that Amazon EKS is distributed across 3 availability zones with a virtual private cloud (VPC) configured to public and private subnets in each zone. Each public subnet has a Bastion host connected to another’s availability zone Bastion host on a public subnet. Also, each private subnet has a Kubernetes node connected to another’s availability zone Kubernetes node on a private subnet.
Deploying a Kubernetes cluster to EKS using the AWS console
Using this method, you can deploy a Kubernetes cluster to AWS without writing any line of code or using your CLI.
To utilize this method, you first need to create an account on AWS if you don’t already have one. If you already do, then sign into the AWS console.
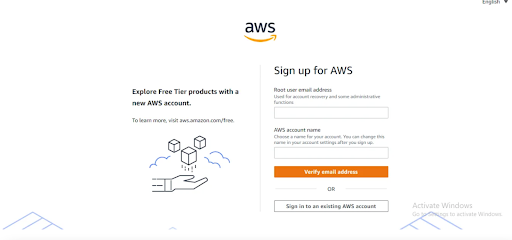
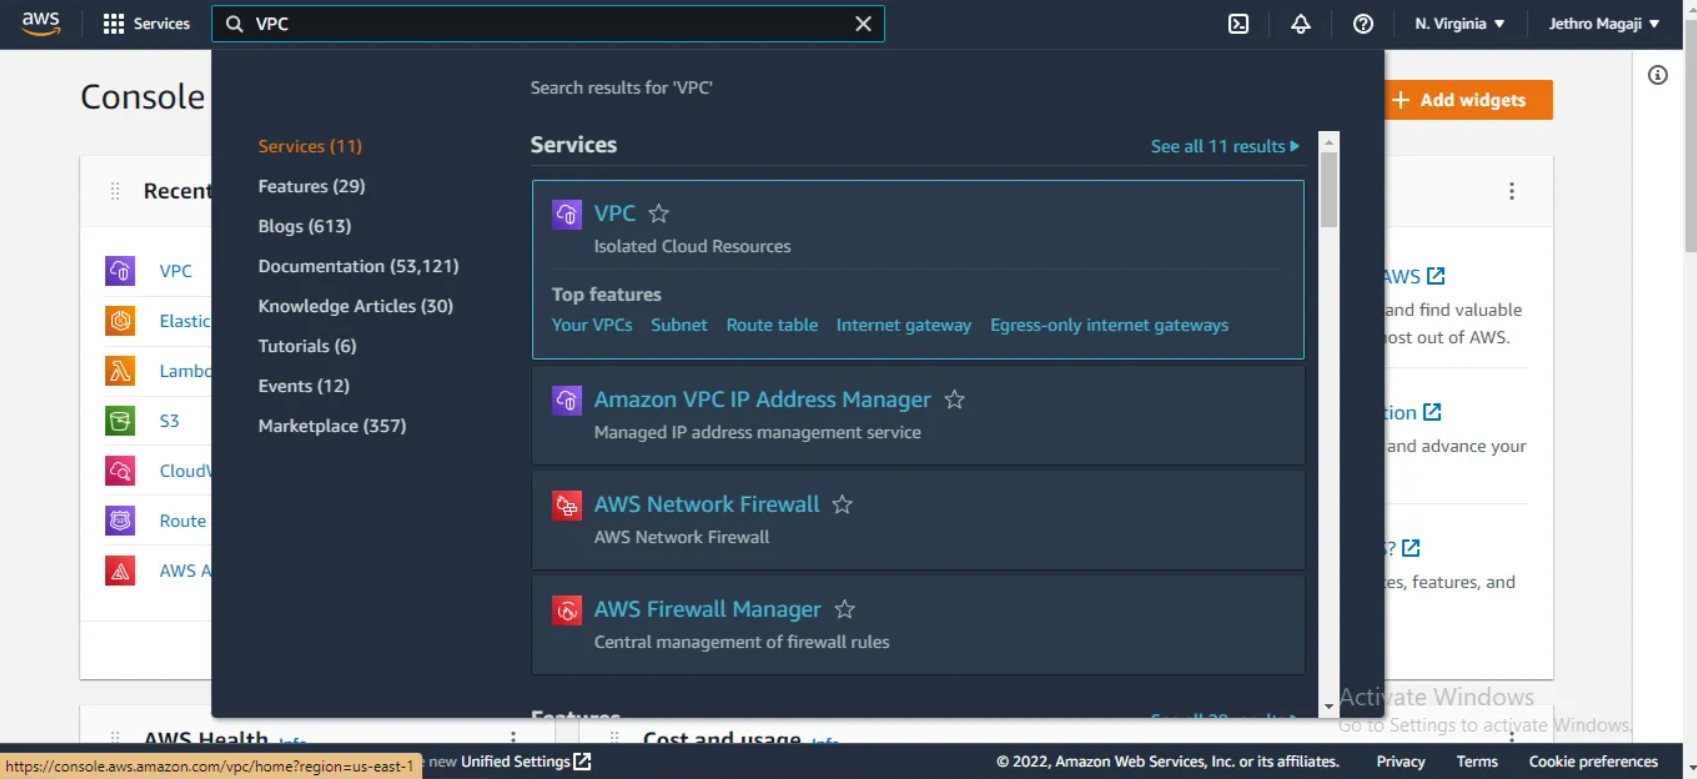
After you’ve logged into the AWS console, choose your preferred availability zone, search for “VPC” on the search bar, and navigate to it.
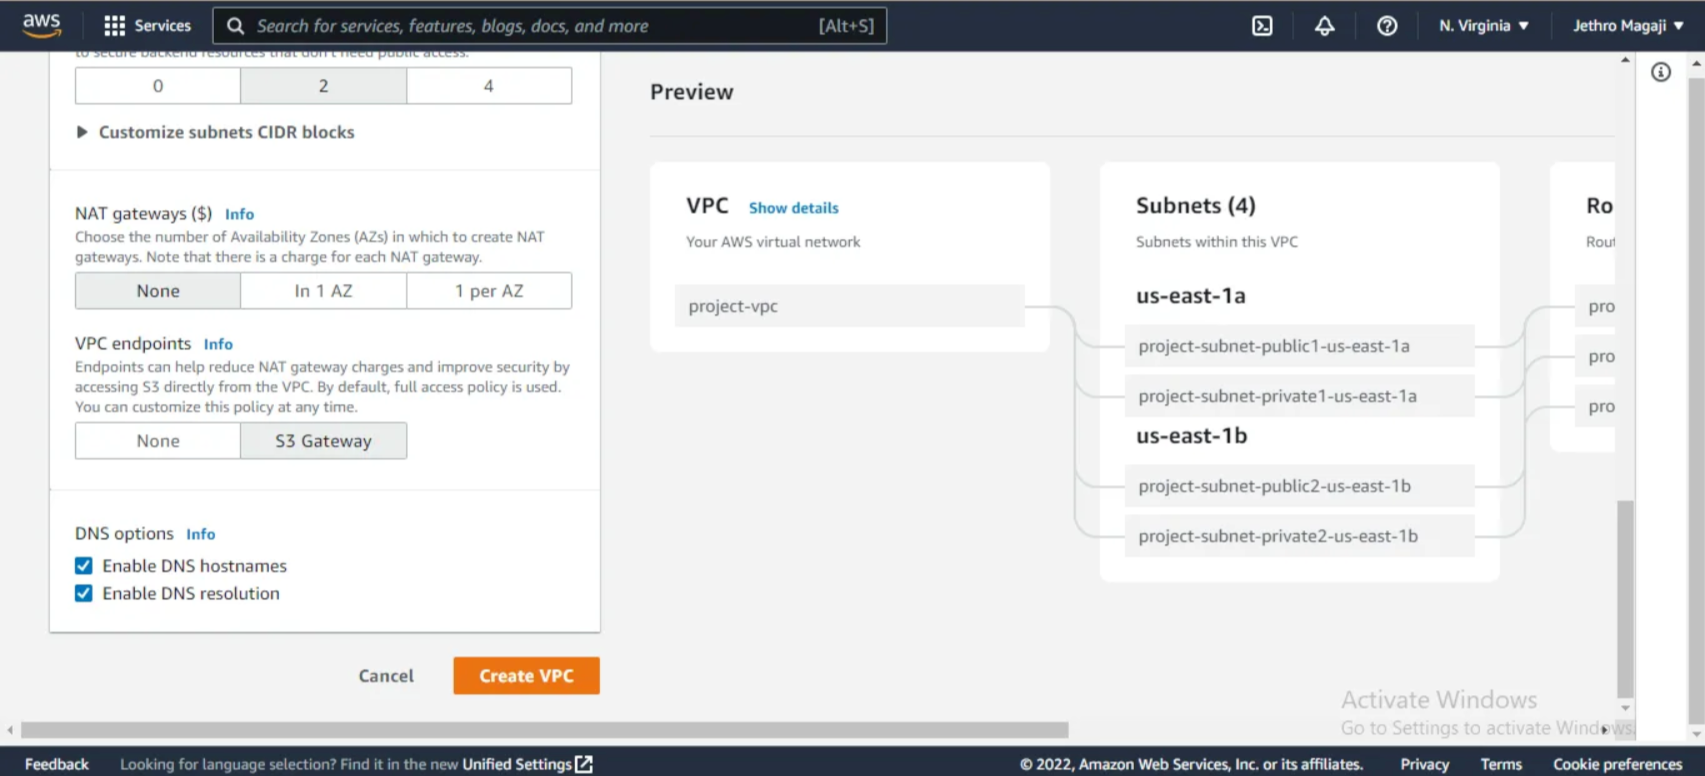
On the VPC dashboard, click on “Create VPC”, leave the default configuration as is, and then click on the “Create VPC” button to create a virtual private cloud with configured public and private subnets.
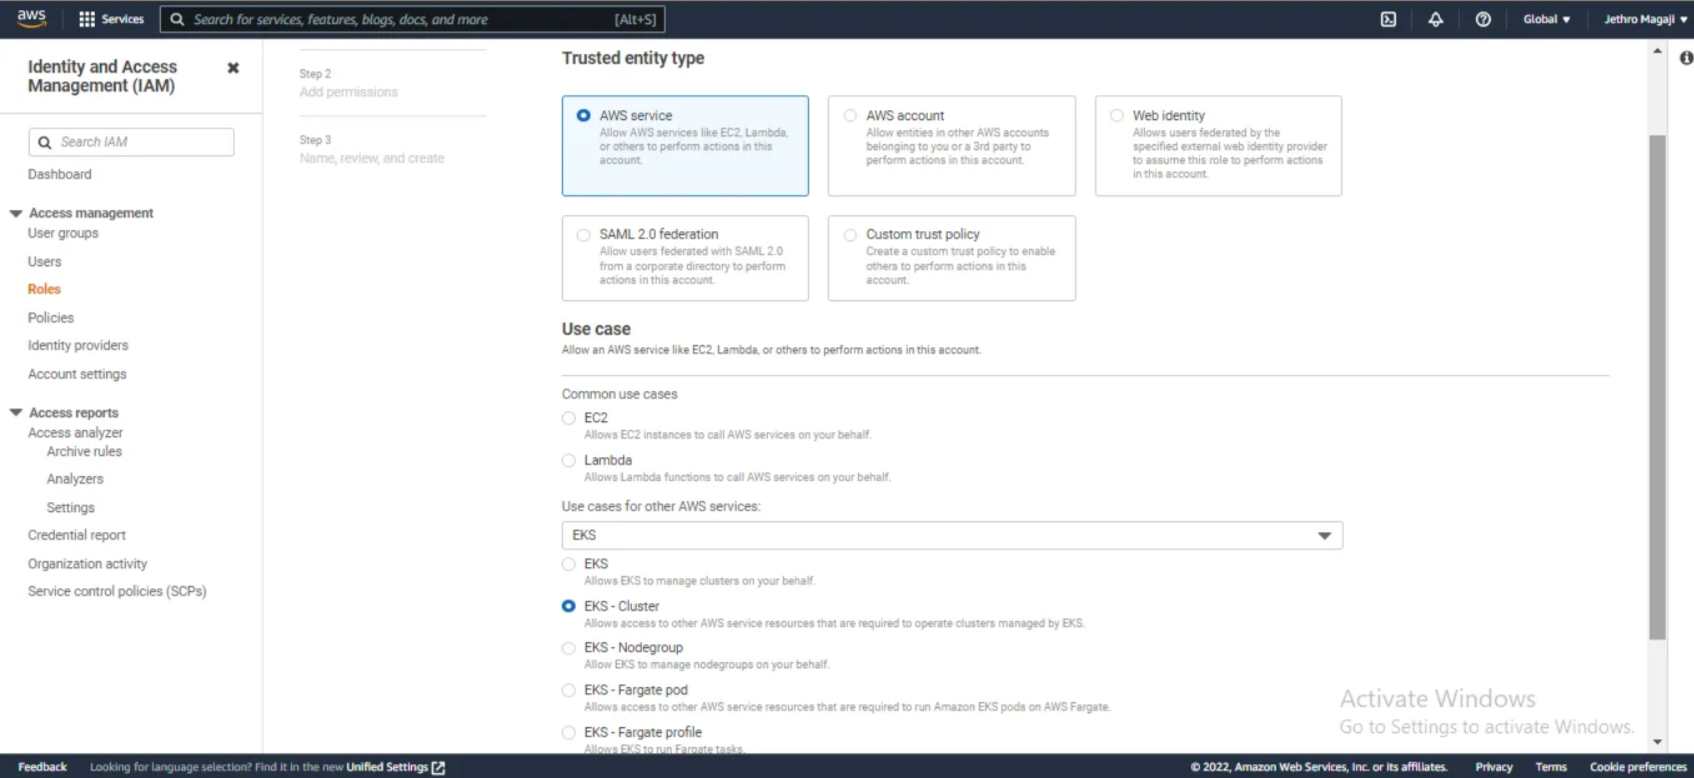
The next thing you’ll need to do is create an IAM role with security groups that give permission to work with EKS. To do this, search for Identity and Access Management (IAM) on the search bar and then navigate to it. On the IAM page, click on “AWS Service” -> “EKS cluster” -> “Next” to add the required permissions, a name, and complete the IAM role creation process.
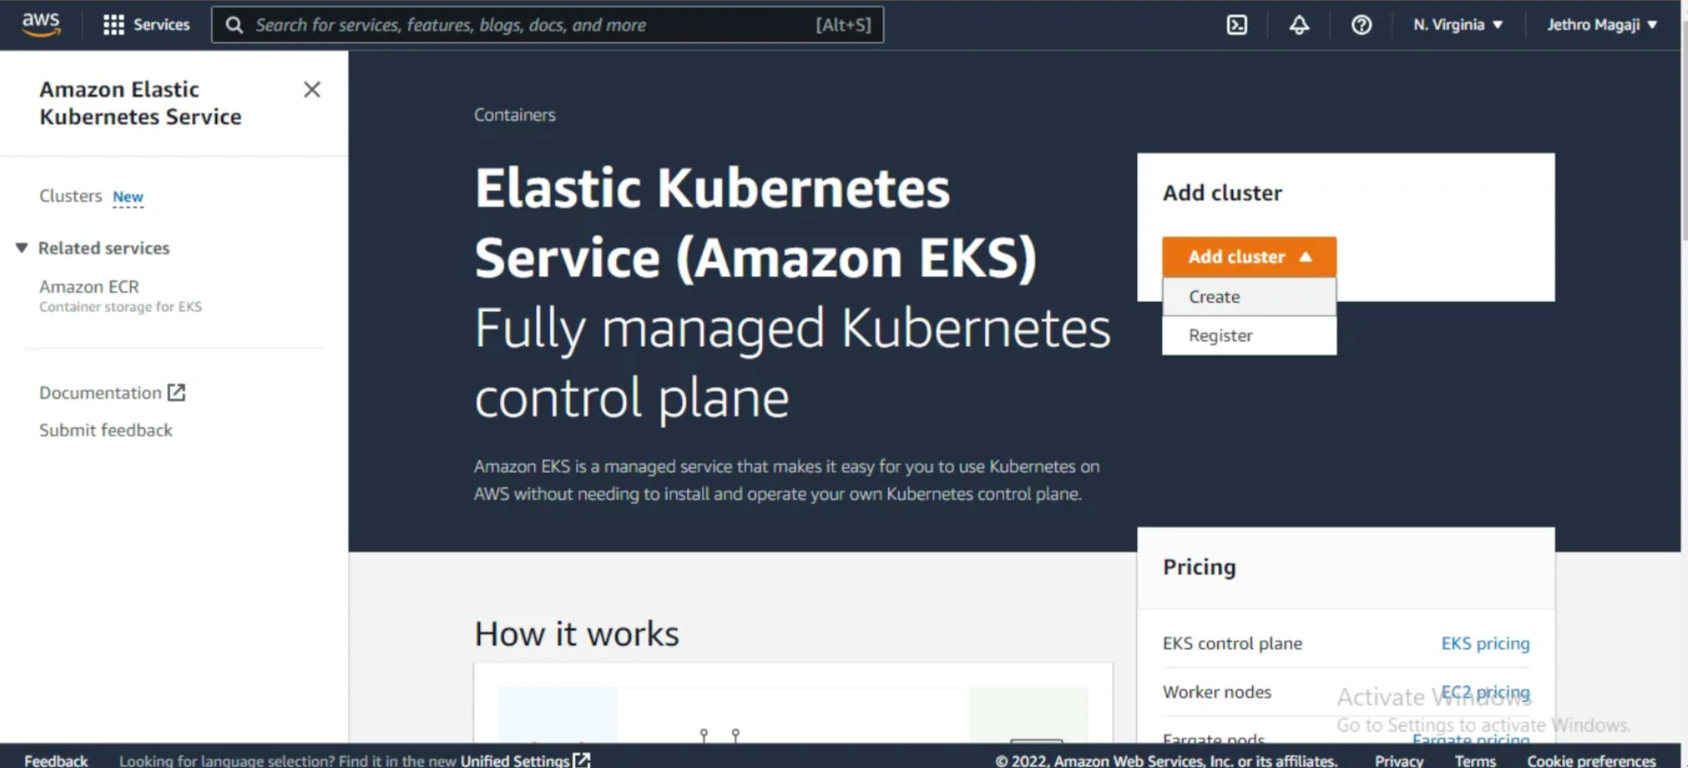
Create a cluster on the Amazon EKS dashboard
Creating a cluster on the EKS dashboard allows your containerized applications to run in multiple environments. To do this, navigate to the Amazon EKS dashboard by searching for “EKS” in the search bar, then click “Add cluster” and select “Create” to get started.
Configure the cluster by selecting and choosing the IAM role you created for the EKS cluster, then click “Next” to specify the network. Next, specify the network by selecting the virtual private cloud you have created. You can also leave the default values like the subnets, IP address, and endpoint access.
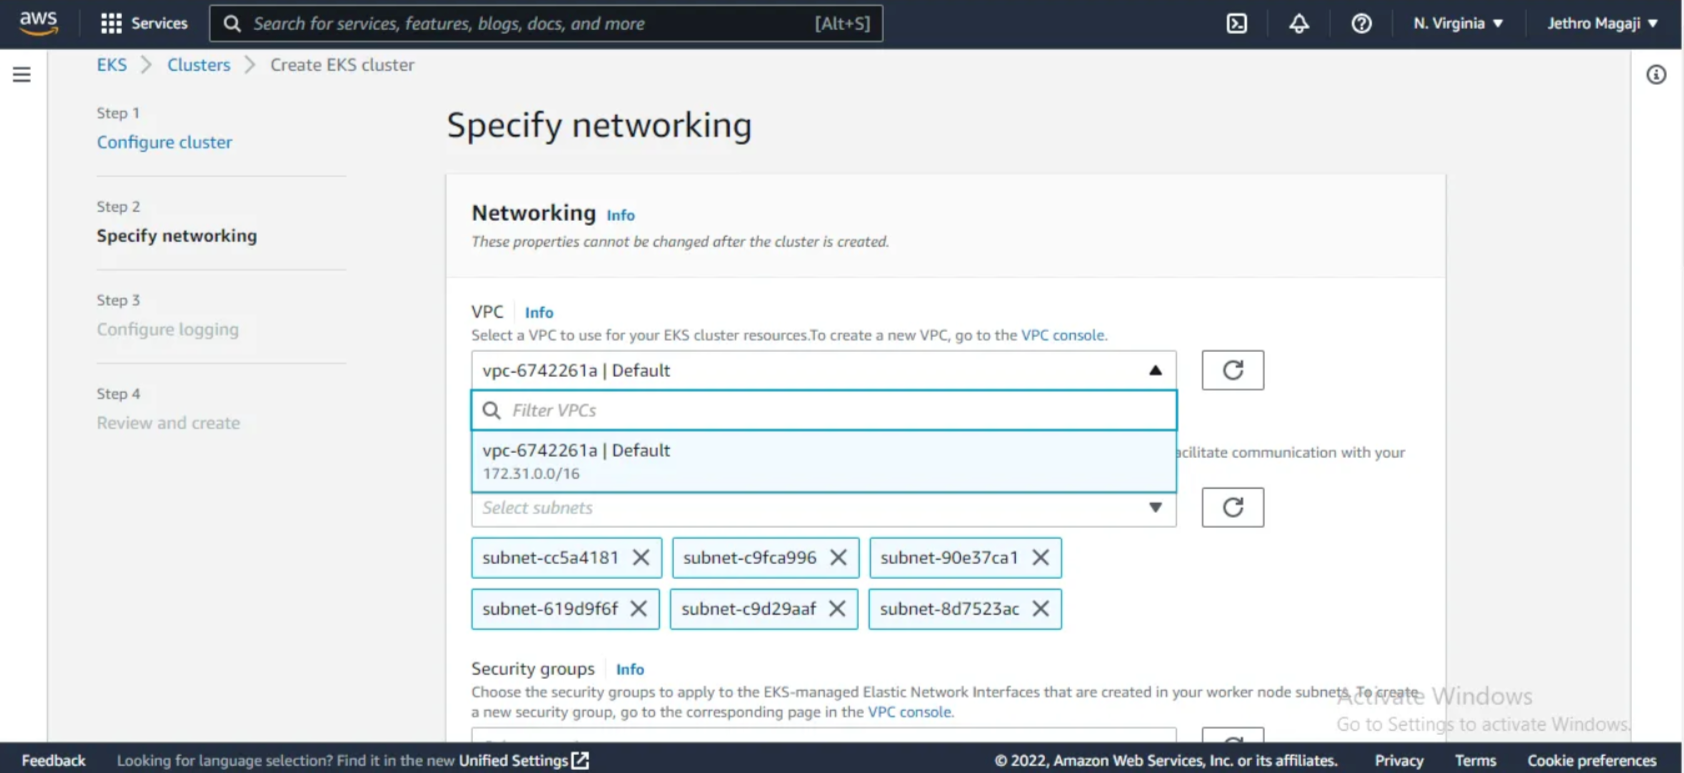
After specifying the network details in “Step 2”, then configure logging in “Step 3”, you can leave the default values and click “Next” to review and create the cluster in “Step 4”.

Finally, you can connect to the EKS cluster from your local machine to deploy your applications. You can check out this video on how to deploy a webapp to Kubernetes cluster on AWS EKS.
Deploying a Kubernetes cluster to Amazon EKS using your local machine
In this section, I’ll show you how to use your local machine to deploy a Kubernetes cluster to Amazon EKS. Doing this also requires a Virtual Private Cloud (VPC) and an IAM role, so if you don’t have them already, scroll back to the “Deploying a Kubernetes cluster to EKS using the AWS console” section and see how to create them.
Install and configure AWS CLI
We first need to install and configure the AWS command-line interface since we will use it to work with Amazon EKS directly from our local machine.
To do this, click on this link to download and install the AWS CLI. After you’ve installed the software, add the AWS CLI to your path with your AWS credentials. You can confirm if it’s been installed correctly by running this command
aws — version
on your terminal.

Setting up an EKS cluster using the eksctl command
To create a Kubernetes cluster on your local machine, you’ll need to set up an elastic Kubernetes cluster master node using the eksctl command. The Elastic Kubernetes service command tool (eksctl) is a simple CLI tool for creating clusters on Amazon Elastic Kubernetes Service.
With eksctl installed on your local machine, you can create a cluster with a single command without the hassle of following the steps in the AWS Elastic Kubernetes Service (EKS) architecture, simplifying the whole process for you and saving time.
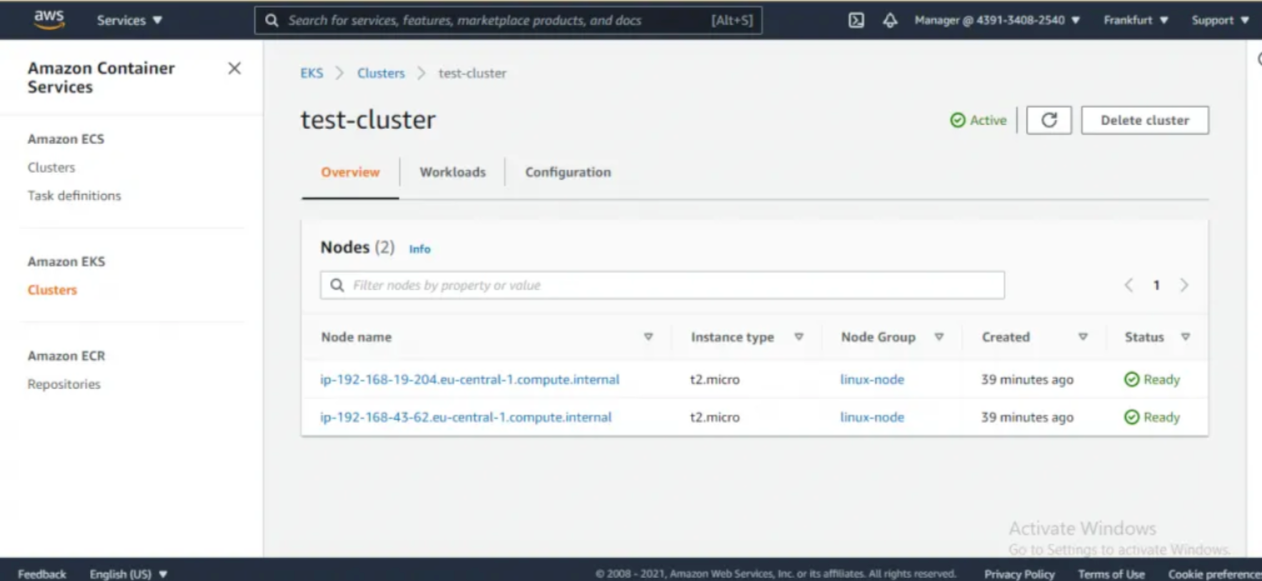
Run the command below on your CLI to create an EKS cluster. For context, this command above creates a cluster named “test-cluster”, under version 1.21, in the
eu-central-1 region
, the
nodegroup
name is
linux-bode
, the
node-type
is
t2.micro
, and it has 2 nodes.
eksctl create cluster — name test-cluster — version 1.21 — region eu-central-1 — nodegroup-name linux-node — node-type t2.micro — nodes 2
After successfully creating the cluster, you’ll be able to see it on your Amazon EKS console.
Conclusion
So far, you’ve learned about the components of the Amazon EKS architecture and how to deploy a Kubernetes cluster on AWS using the AWS console and your local machine.
Don’t forget to shut down all services or instances created for this tutorial, as leaving them active may result in charges in the future.
Thank you for reading this article. If you have any questions or concerns, do well to share them in the comments section.
Simplified Kubernetes management with Edge Stack API Gateway
Routing traffic into your Kubernetes cluster requires modern traffic management. And that’s why we built Edge Stack to contain a modern Kubernetes ingress controller that supports a broad range of protocols, including HTTP/3, gRPC, gRPC-Web, and TLS termination.

